
Many boat owners shy away from Gel Coat Repair because they think it’s a complex and difficult job. However, professional-looking repairs are within reach with the right tools and materials.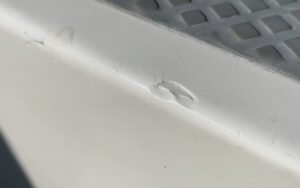
A standard gelcoat repair kit contains a mix of pigments and coloring agents to match the gelcoat to your vessel. Before applying any product to a damaged surface, clean the area with acetone.
Sooner or later, every boat owner gets a scratch, gouge, or chip in their gelcoat. It isn’t always a big deal, but it makes the pride of ownership take a hit, and it can be unsightly. Often, this damage is caused by hitting your dock, other vessels, or even just bumping into something on the boat. This can be a good time to think about getting a professional to do the repair. But in the meantime, a few simple steps can make the damage almost disappear.
Start by wiping down the damaged area with acetone to remove surface dirt and waxes. This will give your new gelcoat a better bond with the damaged areas.
If the scratch is fairly deep, a good epoxy filler can be used to create a solid surface. This will prevent water ingress in the future. If it’s just a shallow nick in the gelcoat, however, there’s no need to use any resin, and it will probably be OK to wet sand the area and polish it with rubbing compound.
For any deeper scratches, it is important to open up the area a little. If you simply paint over them, the gelcoat resin will bridge the scratch, and you’ll end up with a patch that doesn’t blend well into the rest of the color on the boat. So draw the corner of a screwdriver or scraper down the scratch to open it up a little.
Once the scratch has opened up a bit, wet-sand it with 220-grit wet-or-dry paper. This will be a bit rough on the surface, so wear cloth garden gloves (the kind with hard dots to save your fingertips). Wet the sand with the grain, making sure you are using a flat block, and keep a trickle of water running over it. If you use a high-quality wet or dry sanding system with a sanding block, the final appearance will be as smooth as new.
Then, when the new gelcoat has fully cured, paint it with your color-matched gelcoat. If the gelcoat color is a little off because it has been exposed to sunlight over time, you can use a bit of rubbing compound on a soft cloth to buff the area a few times until it matches.
Chips
While they are not as common as dents or scratches, chips in gelcoat should be repaired as quickly as possible to prevent water from entering and potentially damaging the fiberglass structure of your boat and rusting metal components. A good gelcoat repair kit (different brands are better suited to different types of repairs) will include all the products you’ll need. Be sure to follow all the safety instructions that come with your tools and products, especially when handling rubbing compound or paint stripping chemicals.
To repair a chip in your gelcoat, first mix up some of the resin or hardener you have purchased with the catalyst to make a paste. Use a putty knife to spread the paste over the damage. Be sure to overfill the area; gelcoat shrinks as it cures, so you’ll need the extra thickness of the filler to prevent a void later on. Once you’ve filled the chip, force out any air holes with a putty knife and seal the area from the air with either a PVA curing agent or a piece of Saran Wrap or wax paper. Gelcoat does not cure properly if exposed to air, so the sealed area will help your repair last the lifetime of your vessel.
Next, sand down the area of your gelcoat repair until it is flush with the surrounding surface. Start with 180-grit waterproof paper wrapped around a block, then move up to 240-grit and finally 400-grit for a smooth finish. Once the area is smooth and hard, remove the masking tape and plastic sheet, then buff the area with a buffer until it is shiny and blends in well with the surrounding area.
You can also polish a gelcoat repair to make it shine, though if your repair is in an area that sees lots of flexing (such as the corner of a deck hatch), this might not be the best idea. A polish might cause the fiberglass to flex too much, leading to stress cracks. Stress cracks are the most serious type of gelcoat damage. They usually show up as fine hairline cracks, but if left unchecked, they will grow into full-blown spider or star cracks that can compromise the structural integrity of your boat.
Cracks
While most scratches and chips are cosmetic issues caused by impact with hard objects like winch handles, downrigger weights, or 15-pound lobsters, cracks in the gel coat can be a sign of serious structural problems with the fiberglass or the boat’s construction. It’s important to fix these cracks as soon as possible. Cracks that are left untreated can allow water to seep into the fiberglass and rust the metal components underneath.
Cracks are easier to fix than chips, as you do not need to remove any of the damaged gelcoat, but you do need to clean the area around the crack and wash it to make sure it’s free of dirt and grease. Then you need to choose the correct kit to repair your gelcoat. Different kits have different components, including bases, pigments, catalysts, and cleaning solvents. Once you have chosen the product you need for your repair and mixed the base and catalyst to the proper ratio, brush on the gelcoat and spread it with a small wood or plastic putty knife. You should have about a 15-minute window of working time after adding the catalyst before it starts to set and harden. Make sure the gelcoat is a little higher than the surrounding surface to allow for sanding. Once it is completely dry, sand with 220-grit wet sandpaper or, for a really smooth finish, 400- or 600-grit.
When filling a crack, be careful not to overfill it, as the gelcoat will shrink as it cures and leave a gap underneath. Use a plastic putty knife with a sharp, clean edge to avoid pulling out any of the gelcoat as you fill it. You should also cover the repaired area with a piece of Saran wrap or wax paper to prevent air from getting into the gelcoat as it cures. Once cured, the repaired gelcoat should be sanded smooth with 220-grit sandpaper, then wiped down and sprayed with a top coat of high-quality marine polish. This is the only way to guarantee your gelcoat repair will last as long as possible. By following these tips and using a quality gelcoat repair kit, you can extend the life of your boat’s gelcoat.
Wet-Sanding
Wet sanding gelcoat uses the same process as dry sanding but with water. This softens the abrasive and prevents dust buildup. The water also lubricates the paper, making it easier to work with and providing a smoother finish. Wet sanding is particularly helpful for removing gelcoat that has oxidized or faded. This is a deep effect that cannot be corrected with polishing alone, as it goes beyond merely dulling the surface.
A good wet sanding system begins with testing the gelcoat texture and degree of thickness to determine which type of sandpaper is required. Each gel coat has a different texture, so it’s important to choose the right grit of sandpaper to avoid damaging the surface of your boat. Often, soft gelcoat will choke DA pads quicker than harder or brittle materials, so it’s advisable to start with the lowest possible grit and move up only when it becomes obvious that no progress is being made.
Once the area to be repaired is sanded down to the bare fiberglass (using 120-grit hand sandpaper on a block), it’s time for some wet sanding. Begin with 320-grit wet or dry paper and dip it frequently into water to keep it clean and lubricated for easier work. Move the sandpaper over the damaged areas with moderate pressure until the scratches left behind by the coarser abrasive papers have disappeared.